First of all. No. I am not a vegan. But for the state of health of my household inhabitants, we have decided to change our cooking ways.
Some changes to the household:
Mostly vegetables. Healthy fats. Low cholesterol. Healthier alternatives. Lesser meat. Still keeping' it delicious.
This has been a challenge at first. But I noticed a slight change in the household look at cooking: It is in indeed fun. It's fun because experimenting in ways to make a healthier meal is creative. And being creative is fun. It is easy to make caesar salad dressing from my parent's time-tested recipe, but how can we keep it delicious and healthy at the same time? That's the challenge. And we have embraced this and opened our pantry and refrigerators. Bring it on amaranth! Why yes, Señor tofu, you may join us for breakfast.
A member of my household shed 40 pounds and his cholesterol level is down to a normal level. And he enjoys the occasional Beef taco. Gnocchi gorgonzola. Even macaroni salad. But we don't make a habit of it. We love to eat and love to cook. And have changed our ways slightly. I'll still post an occasional meatball parmesan recipe. But also expect to see healthier ingredients spread throughout some recipes.
We can't stop now. We're just getting started.
Mom and Dad's Caesar Salad Recipe - Re-engineered Vegan
This has been our go-to fast and easy dinner when we are way too tired to cook. It is simple and easy. I adapted it from my parent's delicious caesar salad dressing recipe. Just a few changes and it tastes the same, but healthier. Enjoy!
1 clove garlic - finely chopped and smashed into bottom of bowl
1/4 cup fake parmesan cheese
2 tbsp lemon juice
1 tbsp tahini
1 tbsp dijon mustard
Package Iceberg Lettuce
Mix all ingredients together. Add lettuce and toss. That's it.
Add your favorite toppings. Steak. Fake Chicken strips (we love). Shrimp. Whatever you like.
Sunday, May 27, 2012
Saturday, May 28, 2011
Blasphemy! Seasoned Buttered Crab Pizza

Some say you must throw salt over your left shoulder after the salt shaker falls.
Some say you must hold your breath while passing by a graveyard, so not to let the spirits in.
Some say real Italians don't use canned sauces and gravies.
Some say Charlie Sheen is a good actor.
Don't believe all you hear!
I say, real Italians use canned sauces and gravies, only in moderation, and dependent upon the application.
Application #1: The pizza pie. I use Don Peppino's Pizza Sauce. It has a nice, tangy flavor and great texture - perfect for pizza!

And if you looooove buttered crab, you will absolutely adore these individual pizzas.
Ingredients:
4 Whole Wheat Tortilla Wraps
Imitation Krab (Yes, they spell crab with a K on the label)
4 tsps butter (melted)
Old Bay Seasoning
1 can Don Peppino's Pizza Sauce
Shredded Mozzarella Cheese
Step 1: Pre-heat oven to 350 degrees
Step 2: Place each tortilla wrap in a 9" pie pan
Step 3: Spoon approx. 1/4 cup pizza sauce over each wrap
Step 4: Sprinkle approx. 3 tsp. old bay seasoning over the sauce
Step 5: Sprinkle approx. 1/4 cup mozzarella cheese over each wrap
Step 6: With your fingers, roughly tear apart the crab meat and place on top of the cheese
Step 7: Drizzle 1 tsp. butter over each pizza
Step 8: Sprinkle Old Bay seasoning over top
Step 9: Pop in the oven for 10 minutes, or until crisp
These pizzas are perfect as an appetizer for a dinner party, or for a BYOT (Bring your own topping) pizza night in. You can try any topping of your choice. I made margherita pizza with fresh sweet basil and mozzarella and a fresh mushroom version!


Enjoy!
Monday, January 3, 2011
Ham & Fennel Bruschetta - Ham Fest 2011

OK OK, it's been a while since I last posted. But, I'm back for good. I took some time off for some food soul searching!
I completely restocked my fridge with fresh ingredients to keep me in check. No more take out, no more eating on the go. Only fresh ingredients so I can cook every day. Day after day. After day. After day. OK, so maybe not every day. Check in often.
Today, I have made something using one of my favorite foods: Ham! If you remember my Ham Fest 2010, you will remember I created meal after meal from leftover Easter ham. Everything from Ham quiche to Ham muffins. I decided to be a little healthier this year for Ham Fest 2011 and create a Ham & Fennel Bruschetta. Let's get started!
Ham & Fennel Bruschetta
Serving Size: 4 Pieces
Ingredients:
6 slices Italian bread
6 tbsp Greek yogurt
1 cup leftover ham, cubed
1 tbsp rosemary (crushed in hand)
1/4 cup Parmesan cheese
1/3 bulb fennel (sliced thin)
olive oil
Heat oven to 350 degrees
Drizzle olive oil on fennel and top with parmesan cheese
Bake in oven for 10 minutes
In the meantime, mix together yogurt and rosemary
Spread yogurt mixture on bread, top with ham and toast in toaster oven until nice and crispy
Top with fennel and baked cheese crumbs
Enjoy!
Sunday, September 26, 2010
Take That Dunkin' Donuts! - Egg White Flatbread Turkey Breakfast Sandwich

Dunkin' Donuts has created a DDSmart menu, a menu consisting of approximately 9 healthier alternatives to their regular menu. The newest addition, the egg white flatbread turkey sandwich caught my eye immediately. Maybe it is the commercials, maybe I was just hungry, or maybe it was my boyfriend constantly saying "You have to try this Dunkin' Donuts breakfast sandwich, it's awesome." So I did, and yes, my friend, it is awesome.
There are 2 varieties, an Egg White Veggie sandwich which contains egg whites, peppers, mushrooms, onions and reduced fat cheddar cheese on a multigrain flatbread. The other variety is an Egg White Turkey Sausage sandwich which contains egg whites, spinach, turkey sausage and reduced fat mozzarella cheese on multigrain flatbread.
After trying the turkey version, I just had to try and recreate it - But I didn't know it was going to be this easy. I think I'm on to something here. I enjoy recreating recipes. I have been recreating my family's recipes for years. Now it is time to recreate a Dunkin' newcomer. Can she do it? Oh yes, she can!
Reasons why you should make this version rather than purchasing the Dunkin' Donuts version?
1. Timing- This sandwich was made within a commercial break. I had help, however, from my boyfriend, to create 2 of these within this short timeframe (we wanted to get back to the living room to see "Chopped" on the Food Network). Recreating this sandwich takes less time than it does to get out of your car, wait in line, place your order, wait for it to "cook" and then drive home and eat it.
2. Cost - My version is less expensive. DD charges $3.00. The entire grocery bill came to $16.00, which makes approx. 8 sandwiches, with leftovers. Savings: $8.00
3. Healthier - The Foodgitive version is healthier for you. The DD version contains 280 calories and 6 grams of fat. The Foodgitive version has 200 calories and 4 grams of fat.
Don't just take my word for it, try this recipe - if you have a few minutes to spare during your favorite TV show, of course!
The Foodgitive's - Take that Dunkin' Donuts! - Egg White Flatbread Turkey Sandwich (Serving Size 1)
Ingredients
1 Pepperidge Farm Deli Flats Whole Grain Rolls
4 tbsp. Egg Beaters Egg Whites
1 tbsp. pre-chopped green peppers
1 tbsp. green onions (chopped)
1 slices Veggie Cheese slices (soy-based)
1 slice reduced fat turkey deli slice (chopped)
Salt & Pepper to taste
Pam nonstick spray
Step 1: Spray the bottom of a microwave-safe bowl with Pam
Step 2 : Combine egg whites, green peppers, turkey, green onions, salt and pepper in a microwave-safe bowl (I used a creme brulee bowl to get that perfect rounded shape for my sandwich)
Step 3: Microwave on high for 1.5-2 minutes
Step 4: Remove from bowl and place on deli flat
Step 5: Place cheese on top
Step 6: Enjoy
Saturday, September 11, 2010

Saturday, September 4, 2010
Ratatouille

Ingredients:
1/4 cup olive oil
2 onions
3 bell peppers
1 small eggplants
1 yellow squash
1 zucchini
2 tomatoes
3 cloves garlic
1 large can crushed tomatoes
1 tablespoon minced fresh thyme
salt and pepper
1/4 cup chopped fresh basil
Directions
Slice the vegetables into thin rings.
Arrange them in a large baking pan dish with olive oil and turn to coat
Bake for 40 minutes in a 375 degree oven.
In a separate pan, add a splash of olive oil and add garlic and cook for a few minutes, making sure not to brown
Add the tomato sauce, basil, thyme, a dash of salt and a dash of pepper
Heat over medium-low heat , stirring occasionally for 15 minutes
Pour liquid over vegetables and serve

Tuesday, August 24, 2010
They'll Never Guess What's Inside

Don't let the name of this decadent dessert fool you - these brownies will definitely compete in your recipe chest for top dessert. Almost cake-like, but yet with crispy ends and a flaky top layer, these brownies will have you coming back for seconds and thirds.
Stumped by the zucchini addition? By adding zucchini to desserts, moisture is added, because zucchini is full o' water, leaving your desserts, such as brownies, cake and bread, extra moist with a hidden addition of fiber (don't tell the kid's because they'll never know).
Ingredients:
1 Box Ghiaradelli Chocolate Brownie Mix with Walnuts
Water and oil as directed
Rather than using egss, substitute eac egg with 1 tbsp. sour cream (I use light sour cream)
1 1/2 cups food processed zucchini (with skin removed)
Directions:
Heat oven to 400 degrees
Follow directions on box
Tip: Make sure not to spray sides of baking pan with nonstick spray when baking brownies, because if you do so, the mixture won't climb up the sides to rise
Cook for 41 minutes
Let cool completely before serving
Sunday, August 22, 2010
Guessing Game... What's the Gadget?
What does this kitchen gadget look like to you?
All guesses welcome.
Hint: It was purchased in Italy and has been passed down in my family.


All guesses welcome.
Hint: It was purchased in Italy and has been passed down in my family.


Saturday, August 21, 2010
Panko Crusted Zucchini-Mint Sandwiches

I have taken into consideration the many options given to me through my Twitter account and through this blog for cranking out delicious meals, sides and desserts with my extra large zucchini and have decided to make the following: zucchini sandwiches, zucchini bread (my mother's recipe), ratatouille and zucchini brownies. You will see the recipe for zucchini sandwiches here today but keep an eye out for the others in the days to come.
My sister came up with the idea of making zucchini sandwiches, using the zucchini slices as the "bread". What a great idea! I used my mayo dredging technique, used to make my Fried Eggplant Rings for this recipe to keep it light and creamy. You can any fresh ingredient as the sandwich filling, including tuna and cheese, grilled chicken and even pepperoni and cheese to create a mini pizza. I chose vine-ripened jersey tomatoes, fresh mozzarella and fresh mint. The mint is essential in this dish, adding a nice pop of flavor to the unseasoned panko breadcrumbs.
Zucchini Sandwiches
Serving Size: 2 Sandwiches
Ingredients:
4 extra large slices of zucchini, sliced 3/4" thick
2 vine-ripened roma tomatoes, sliced 1/2" thick
4 slices fresh mozzarella cheese, sliced 1/2" thick
1/4 cup fresh mint, chopped
3/4 cup mayonnaise (I used light Smart Balance mayonnaise)
Panko breadcrumbs for coating
Salt & pepper to taste
Directions:
Heat oven to 425 degrees
Spray nonstick spray onto pan
Mix together mayo, mint, salt and pepper
Spread mayo mixture over both sides of the zucchini
Dip zucchini into the panko and lightly press to firmly coat
Place onto tray and cook for 12 minutes on each side
Add tomatoes and mozzarella cheese to center of sandwich and return to pan
Heat for approx. 5 minutes, or until cheese is lightly melted
Fork and knife needed!
I just had to take a picture of these delicious, juicy tomatoes for all to see!!!!

Thursday, August 19, 2010
Pretty Big Zucchini

Save the jokes for later, people.
I was given this extra large zucchini and have a few ideas in mind on what to make with it, but I want to hear your suggestions. Anything from breakfast to desserts, I would love to hear all of them. If it sounds interesting, I will whip it up and post it on my blog. (I will most likely make multiple meals, considering the size of this zucchini)
Thanks and keep the opinions coming!
Wednesday, August 18, 2010
Fried Panko Pork and
Grilled Corn & Blueberry Salsa

That's right folks- grilled corn and blueberry salsa.
I've been inspired this past week, whipping up delicious goodies earning the title of "Best Dish of the Year" in my household from the attendees (my sister and boyfriend).
Grilled corn and blueberry salsa is a dish inspired by a recipe my friend sent over to me including peaches and grilled corn. I immediately thought to myself, "If peaches work, why can't blueberries?" So, I got cooking...
Grilled Corn and Blueberry Salsa
Ingredients:
1 pint blueberries
6 ears corn
1/4 cup chopped fresh mint
1 tbsp lime juice
Salt and pepper to taste
1 tbsp. butter
Directions:
Boil a pot of water and add a pinch of salt and butter
Snap corn in half and add to pot of boiling water
Cook for 8 minutes
Set aside and add add a sprinkle of lime juice and coat with salt and pepper
Add to preheated grill and cook for 8 minutes, turning to "char" all sides
Set aside to cool
Smash blueberries in bottom of pan
Add mint, salt, pepper and lime juice
Cut corn off of the cob with a sharp knife and add to mixture
Mix everything together and serve!

Fried Panko Pork
Ingredients:
4 Center Cut Pork Chops
Salt and pepper to taste
Panko bread crumbs for coating
Vegetable oil to fill 1" of pan
Directions:
Heat oil in a large fry pan over med-high heat
Dry pork chops with paper towel and season with salt and pepper
Add a dash of pepper to panko coating
Dip pork chop into coating on both sides, pressing down to coat evenly
Add slowly to fry pan, making sure not to crowd the pan

Cook until the breading is a nice golden color, approximately 5 minutes on each side
Serve!
Thursday, August 12, 2010
Sour Cream Banana Bread
Sour cream used to make a healthy, creamy banana bread? Who woulda thunk it?
1 cup white flour
1/2 cup wheat flour
1 tsp baking soda
1 tsp salt
1 tsp cinnamon
3 egg whites
1 tsp maple syrup
1/4 cup brown sugar
1/2 cup white sugar
1/4 cup butter softened
1/4 cup chopped walnuts
1/4 cup sour cream
* Preheat oven to 350°.
* Grease 9x5 inch loaf pan with baking spray.
* In a medium bowl, combine flour, baking soda, salt and cinnamom with a wire whisk. * Set aside.
* In a large bowl cream butter and sugars with an electric mixer.
* Add egg whites, bananas, sour cream and syrup, and beat at medium speed until thick. Scrape down sides of the bowl.
* Add flour mixture and walnuts, then blend at low speed until combined. Do not over mix.
* Pour batter into loaf pans and bake on the center rack for 60 minutes, or until a toothpick inserted in the center comes out clean.
Saturday, July 31, 2010
Fresh Chive and Onion Cream Cheese

Before my family's annual crabbing event, we always take the time to wake up with the sun and have an early breakfast together. Coffee, bagels and cream cheese is always our breakfast of choice because it is very simple and easy to eat while we are running around gathering items for the day.
I have a beautiful container garden in my backyard, complete with tomatoes, green beans, herbs, eggplant and chives. And what would go perfect with cream cheese and bagels? Chives. The night before, I sauteed half an onion and 5 stalks of chives in 1 tablespoon of butter over medium-high heat for 8 minutes. After letting it cool, I simply mix it with Philadelphia cream cheese, along with a dash of salt to bring out the chives' complex flavors.
OK, so this is semi-homemade, but it is still wonderfully easy and delicious!
Friday, July 23, 2010
Inspired Pasta - Penne Alla Jennifer

Have you ever tried a dish at a restaurant so delicious that you can't wait to try to recreate it yourself?
My inspiration came from Fellini's Cafe Trattoria in Media, a cute and busy family BYOB restaurant with authentic Italian meals. A place so down to earth, you order your meal by number. No frills, nothing fancy, just honest food made with care. The #26 caught my eye immediately. The #26, also known as Spagheti Alla Norma, is simply a fresh Tomato Sauce with Eggplant topped with Ricotta over Spaghetti!
Look out Fellini's - it's my time to shine. But no worries, I'll be back.
What You'll Need:
6 Large Roma Tomatoes
1/2 Large Eggplant
Salt
Pepper
Dried Basil
1 Pound Penne or Spaghetti
Olive Oil
3 Cloves Garlic, finely chopped
Ricotta for Topping
Directions:
- Heat Oven to 350 degrees.
- Chop Eggplant into 1-inch cubes and toss with 2 tbsp. olive oil, with a dash of salt and pepper
- Spread evenly in large pan and cook in oven for 20 minutes, tossing halfway during cooking
- In the meantime, bring a large pot of water to a boil
- While the water heats, heat a large pan over medium-high heat
- Add 1 tbsp olive oil and heat
- Add garlic to pan and cook for 1 minute
- By this time, the water should have come to a boil. Add salt and pasta. Cook for approximately 10 minutes, or until al dente
- In the meantime, chop tomatoes in one inch cubes and carefully toss in pan
- Add a pinch of salt, pepper and approximately 1 tsp. basil
- Cook tomatoes for 10 minutes, stirring often

- When eggplant is finished cooking, add to tomato mixture and stir to combine.

- Add 1/2 cup pasta water to tomato mixture
- Drain pasta and add to tomato-eggplant mixture
- Remove from heat.
- Stir to combine

- Serve with a few dollops of ricotta sprinkled with a dash of basil
Monday, July 19, 2010
OMG Peach Cobbler

Ingredients:
Fruit "Filling"
4 cups fresh sliced peaches
1 teaspoon vanilla extract
1 Tablespoon butter
3/4 cup sugar
1 tsp. grains of paradise
1 tbsp. cornstarch
The Batter:
1 cups white flour
1/2 cups wheat flour
1/2 cups tapioca flour
6 Tbsp sugar
1 1/2 tsp baking powder
1/2 tsp salt
1/2 stick butter, melted
6 Tbs butter-cold
1/2 cup milk
2 Tbsp butter
2 Tbsp sugar
Directions:
Preheat oven to 375 degrees
Over medium heat, bring fruit "filling" mixture to a simmer
Remove from heat and set aside in round casserole dish
Mix together the flour, sugar, baking powder, salt
Add the cold butter and milk and mix well
Shape mixture into individual patties and place over peach mixture
Brush the melted butter over the cobbler
Sprinkle sugar over cobbler
Bake until the top browns, approximately 45-50 minutes
Sunday, July 11, 2010
Ever Try Grilled Pizza?

It is pretty simple, really. Just use my recipe for pizza dough , but instead of popping it into the oven, you grill it!
Directions:
1. Spray nonstick olive oil spray on stove top or outside grill and heat until nice and hot
2. Roll out pizza dough into large circle and then cut in half
3. Brush one side of dough with olive oil and gently place on grill
4. Grill for 5 minutes and then gently flip over, brushing olive oil on this side and grill for 5 minutes - You will see dough "puff"
4. Spread with shredded mozzarella cheese and your favorite toppings while on the grill, such as sauteed fennel, onions and hot Italian sausage or a simple mozzarella, basil and tomato mixture.
5. If you are making the crust ahead of time, grill the dough and when ready to serve the pizza, pop the cust with the toppings into the oven on 350 degrees for 10 minutes

Sunday, July 4, 2010
Grilled Plantain Chips with Basil

What do you look for when shopping for Plantains? Well, that depends on what you need from the plantain. Green plantains are perfect for stews, yellow plantains with some white and black bruising are great for grilling of frying, and plantains with black covering almost the entire surface area are great for desserts because the more black they get the sweeter they get.
This is a simple recipe you will love to make over and over again for your guests or as a light snack to substitute popcorn.
What You'll Need:
2 tbsp. fresh basil chopped
Nonstick Spray for grill
2 Plantains- cut into 1/2 inch slices
Juice from 1 lime
Dash of salt
Dash of pepper
Directions:
Heat grill- I use a stove top griddle so I placed my plantains directly on top, but if you are using an outside grill, place a sheet of tin foil down on the surface to ensure plantains don't drop through
Spray grill with Nonstick spray
Mix ingredients together
Place slices of plantains on grill and cook for 3 minutes on each side

Remove and sprinkle with additional basil and serve warm
Tuesday, June 29, 2010
Quinoa Tabouli Salad in Grilled Avocado

When the summer months come rolling around, there is nothing worse than slaving
over a hot stove for hours trying to create a perfect meal. You can still create a great meal, however with little stove time to keep cool and light during these summer months.
For this recipe, I simply recreaed my original taboulisalad, using quinoa as the grain rather than the egg-coated buckwheat, and sauteed shrimp was added for texture. The grilled avocado acts as the bowl in this meal, creating a subtle taste of avocado with each scoop - I recommend using a spoon.
What You'll Need:
2 bunches parsley, finely chopped
6 green onions, finely chopped
1 tablespoon dried mint
3 tomatoes, finely diced
2 cups vegetable stock or water
1 cup rinsed quinoa
1 pound fresh shrimp
3 tablespoons olive oil
4 lemons, juiced
1/4 tsp salt
1/4 tsp black pepper
2 avocados
*Bring vegetable stock or water to a boil
*Add quinoa and return to a boil and then reduce the heat to low
*Cover and cook for fifteen minutes, or until liquid is absorbed- stirring occasionally
*Remove from heat and let stand for three minutes
*In the meantime, mix together salt, pepper, lemon juice, olive oil and mint and set aside
*In the meantime, saute shrimp with one tablespoon lemon juice mixture in saute pan for two minutes on each side and let cool
*Mix quinoa together with tomatoes, green onions, shrimp, parsley and dressing mixture
*Add salt and pepper to taste
*Cut each avocado in half and remove pit
*Drizzle a small amount of olive oil on each half and set meat-side down on a hot griddle or barbecue and cook for 8 minutes
*Serve salad inside avocado halves

Thursday, June 24, 2010
Rosemary Dough (Great for Pizza, Stromboli, Bread Sticks or Calzones) With Spinach-Sun Dried Tomato & Ricotta Cheese Filling

As a former employee of a popular Italian pizzeria in South Philadelphia, I learned a thing or two about making pizza dough. I wasn't directly involved in making the dough, let's get that straight, but the smell of the yeast was the sole reason for my wandering over to the dough station for observation. Few things in life are as enticing and delicate as the smell of fresh dough being made with yeast. It smells like clean air- untampered goodness.
If you are unfamiliar with making fresh dough, no need to worry, I have created a great recipe for you to dive into with detailed, step by step instructions so you can gain confidence in the art of pizza making.
This recipe can be used to make strombolis, calzones, bread sticks and pizza dough. You can simply add your favorite topping, filling or dip and you have a less expensive meal for your family. If you plan on bringing your creation to a friend's house, visit your local pizzeria to purchase a box (my pizzeria sold one to me for $0.35) and everyone will be amazed at your presentation skills and your professional tasting pizza dough.
Ingredients for Dough:
2 ½ Tsp. Active dry yeast
¾ cup warm water
1 tbsp. Sugar
3 cups white flour plus more for dusting
¼ cup olive oil plus more for spreading on bowl
1 tsp. Salt
Cornmeal, for dusting
2 tbsp. Rosemary
1 tbsp. Water plus more if necessary
Directions For Dough:
* In the bowl of a standing mixer ( I love my Kitchen Aid) fitted with a dough hook, combine the yeast , warm water and sugar until dissolved
* Let stand 5 minutes
* Turn mixer on #3 setting and slowly add the flour, 1 tbsp at a time
* Add olive oil, salt and 2 tbsp. rosemary (crunched between hands to release scent and oils)
* Occasionally stop mixer and scrape sides and remove dough from hook
* Add tbsp. Water + more if necessary
* Mix for no more than 10 minutes, where the dough will pull away from the sides of the bowl.
* In the meantime, add two cups of water to a microwaveable bowl and heat for two- 3 minutes or until boiling
* Lightly cover your work surface with a dusting of flour and place your dough ball on the surface
* Fold dough over itself a few times, adding splashes of water if necessary for easier handling
* Form dough into a ball
* Lightly sprinkle olive oil into a metal bowl and spread around with a paper towel
* Place ball into bowl and tightly cover bowl with plastic wrap
* Place boiling water and bowl of dough into an unheated oven and let stand in oven for 4 hours
* After four hours, boil another 2 cups of water in microwave for 3 minutes or so
* Punch down the dough ball and place both the boiling water and dough ball back into the oven
* After 4 more hours, repeat boiling water and punching down dough ball
* Four hours later, or overnight, remove dough and punch down once more and start to lightly knead the dough
* In the meantime, create filling **
* Lightly sprinkle work surface and a large rolling pin with flour
* Set oven to 400 degrees
* Place dough ball on lightly floured work surface
* For calzones, cut dough ball into fours and roll out each section until 1/4”- 1/2” thick and make indentations with fingertips
* For Stromboli, pizza or bread sticks, roll out until 1/4”- 1/2” thick and make indentations with fingertips
* Sprinkle pan or pizza stone with cornmeal
* Place ready dough on surface and add filling
* To add filling for Strombolii or calzones, add filling to half side of stromboli only, then fold over creating a pocket.
* Form Stromboli, shape dough into U-Shape
* Fold ends over, pinching as you go along, creating a tight barrier so the filing doesn't escape.
* Tear two or three holes or slits on top of the Stromboli or calzone so steam releases
* For bread sticks, cut into strips using a pizza cutter
* Place in oven for 25 minutes
**For filling:
1 cup ricotta cheese
½ cup mozzarella cheese
1 large bunch fresh spinach (stems removed, washed 3x and set aside to drain water for 10 minutes)
1/3 cups diced sun-dried tomatoes
Few sprinkles red pepper flakes
½ tsp. Nutmeg
4 cloves garlic, finely chopped
2 tbsp. Olive oil
Directions for filling:
* Heat large saute pan and oil over medium heat and add garlic and saute until it becomes fragrant or 1 minute
* Add spinach, sun-dried tomatoes, red pepper and nutmeg and move quickly around the pan and cook for approx. 8 minutes, making sure the garlic doesn't burn- you may have to lower heat to medium-low
* Remove from pan and add to mixing bowl
* Mix in ricotta cheese and mozzarella cheese until combined
Sunday, June 20, 2010
Tiramisu Iced Coffee Drink (Alcoholic)
I needed a pick-me-up this morning but wouldn't dare drink my usual hot coffee in this 92 degree day. Since iced coffees go for a least two dollars at my local coffee store, I figured I would take a stab at creating one at home. There is a small amount of alcohol in this drink, simply added for the flavor. I was hesitant at first in adding the Coffee Liquor and the Marsala Wine, but am so glad I did, because these additions caused the drink to taste like my favorite dessert, Tiramisu.
You do need an iced tea maker for this drink, which costs around $20 (or 10 iced coffees). I have an older model Mr. Coffee Iced Tea Maker which works great for both iced tea and iced coffee. I have also used the more expensive Hamilton Beach Iced Tea Maker which also works well.
Tiramisu Coffee Drink
Makes: 1 Pitcher Coffee Drink
List to Bring With You to the Supermarket:
Alcohol:
4 tbsp. Coffee Liquor
2 tbsp. Sweet Marsala Wine
Pantry:
10 Tsp. Ground Coffee
2 tbsp. Splenda
Refrigerated:
1/2 Cup Soy Milk
Directions:
*Fill Water as Directed for machine
*Fill Ice as Directed for Machine
*Add Splenda, Coffee Liquor, Marsala Wine, Milk
*Fill paper towel with coffee grounds
*Follow directions for machine
*When Machine Turns off, Stir Until Blended and Enjoy!
Wednesday, June 16, 2010
Beer Clams & Linguine

List to Bring With You to The Supermarket:
Refrigerated:
1 Tbsp butter
Pantry:
1/4 cup extra virgin olive oil
2 cans diced clams
1 Tbsp. Anchovy Paste
1 Pound Linguine
Vegetables:
4 small-medium sized Garlic cloves, minced
Spices:
1 Tbsp ground parsley + more for sprinkling
2 Shakes of red pepper flakes
Salt to Season Boiling Water
Liquor:
1/3 cup of beer (I use Lager)
Directions:
Bring 4 quarts of water to a boil in a large pot, add 1 tbsp of salt
Saute the garlic and anchovy paste in oil in a large skillet over a medium-high heat for one minute.
Stir in parsley and red pepper flakes.
Stir in clams and juice and the beer. Cover and cook over low heat 10 minutes,
sirring occassionally
While the mixture is cooking, add the linguine in the boiling water and stir constantly for 9 minutes
Drain Pasta and add the pasta to the skillet with the clams and cook for one minute, stirring to combine
Sprinkle Additional parsley on top and serve
Monday, June 7, 2010
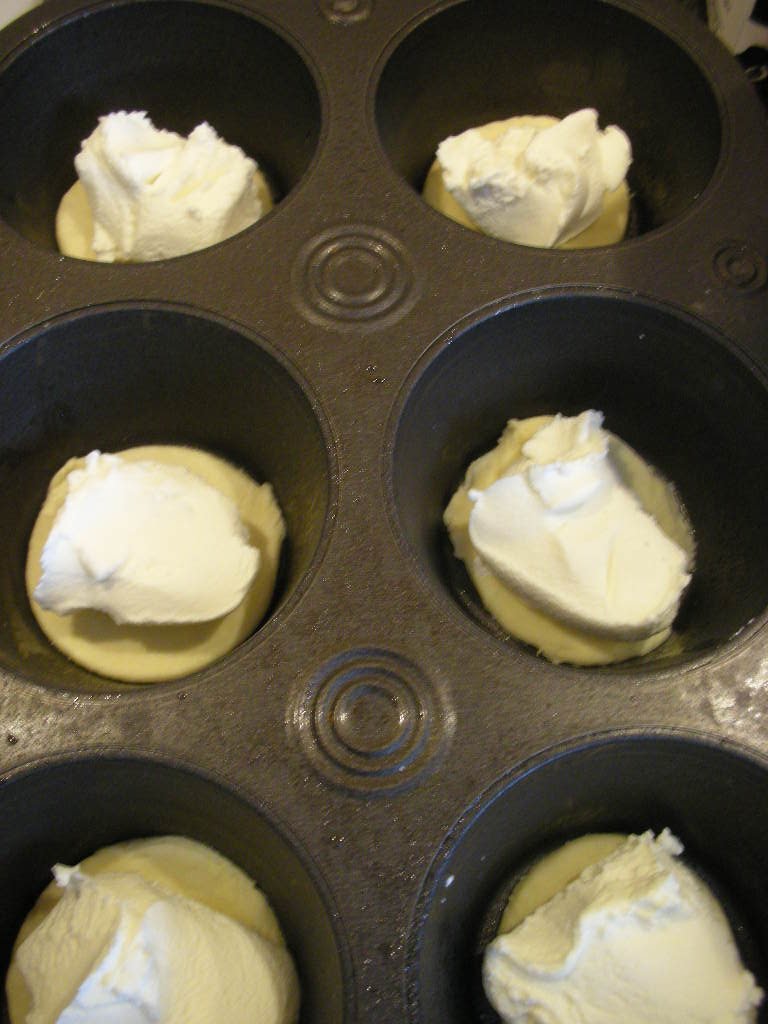
Ham-Stuffed Pancake "Cupcakes"

Peering into the deep pits of my empty tin foil-wrapped paper plate o' leftovers, I have been forced to come to the realization that my adventures with ham have come to an end. I wanted to do so much more with the ham leftovers, but in a way am glad it has run out. I mean, how much ham can one person eat in a week? No more lying in bed pondering over the possibilities ham will bring. No more choosing between ham for dinner or ham for dinner. I can finally get back to normal; well, until I finish these delicious Syrupy Ham-Stuffed Pancake Muffins, of course.
After this, I am turning vegetarian for the week.
Serving Size: 6 Muffins
List to Bring With You to The Supermarket:
Pantry:
2 1/2 Cups Flour
1/4 Cup Sugar
2 Tablespoons Baking Powder
1/4 Cup Light Syrup + 1/3 Cup Syrup Separated
Pam Nonstick Spray
Spices:
1 Tsp. Salt
Refrigerated:
2 1/2 Cups Skim Milk
2 Eggs
Leftovers:
1 Cup Ham
Directions:
*Preheat Oven to 350 Degrees
*Combine flour, sugar, baking powder and salt
*In a separate bowl combine eggs, milk and 1/4 cup syrup, whisk
*Stir wet ingredients into dry, just until mixed thoroughly- the batter will be slightly lumpy.
*Combine Ham and 1/3 Cup Syrup in separte bowl and let sit until ready to use

*Lightly Spray Pam into 6 Slotted Muffin Tin
*Ladle flour mixture into muffin tin filling the slot halfway, Repeat throughout

*Add ham to top of batter. Divide ham evenly throughout
*Ladle batter on top filling to the brim
*Cook for one hour, making sure center is cooked
**Center will be soft and dense, where the outside will be crunchy.

International Great Beer Expo at the Philadelphia Navy Yard

Which statement is true:
1. I love beer.
2. I dream in beer.
3. I married a beer and have little beer babies.
Give up? OK, so I don't have little beer babies running around, but I do still love beer, especially during Philly Beer Week.
And this Beer Expo was the perfect morphine for my beer itch. Fifty international brewers filled the huge auditorium, from local brewers to Japanese delicacies. But my favorite was the Gran Met Ale from Voodoo Brewery located in PA.
And if the good looking gals and girls handing out the beer at this station weren't reason enough to bring you over, the fact that they were handing out 4 ounce samples of their 10 % beer would have you crawling back for more refills. I revisited this booth so many times, I felt as if I needed to disguise myself with beer monacles and a mustachio.
And if it is pretzels you crave, the Famous Kirby's Red Hot Chile Pretzels will not only suffice, but definitely exceed expectations. The intensities range from Mild to Four Alarm Fire. My favorite was somewhere on the hotter side, purchasing a bag of Second Degree Burn which carries a noticeable kick.
So if you missed this event this year, no worries, I'm sure this popular meeting place for beer lovers will be around next year, carrying even more vendors for you to get your drink on.
Sunday, June 6, 2010
Leftover Ham Recipes- Take 1:
Quiche w/ Leftover Ham & Ricotta Cheese

Quiche is a versatile baked dish that has two main bases- pastry crust and eggs. I chose to make individual quiche cups using puff pastry sheets, ricotta cheese, leftover ham, mozzarella cheese and an egg mixture.
The ricotta filling was a last minute addition. I am so glad I added this ingredient because it completely transformed the quiche. It turned the traditional, mainly egg-filled quiche into a creamy delight, where the ricotta cheese wraps itself around each bite.
The container of ricotta cheese and the leftover mozzarella cheese will not go to waste because you can simply make calzones later in the week using these ingredients, including the leftover ham, of course! I will post a recipe for freshly made calzones later this week for you to enjoy.
I recommend making extra quiche cups because these little guys will be gobbled up quickly before you can say the word quiche.
Serving Size: 8 Individual Quiche Cups
List to Bring with You to the Supermarket:
Dairy:
8 Eggs
8 Tbsp. Milk
8 Tbsp. Ricotta Cheese
Mozzarella Cheese for Sprinkling
Frozen:
1 Sheet Puff Pastry Sheet
Leftovers:
2 Cups Chopped Ham
Pantry & Spices:
Pam Nonstick Spray
Salt & Pepper to Taste
Directions:
Use a Muffin Tin with 6 Individual Sections
*Defrost 1 Sheet of Puff Pastry
*Preheat Oven to 350 Degrees
*Spray Muffin Tin with Pam Nonstick Spray
*Beat Together 8 Eggs, 8 Tbsp. Milk, Salt & Pepper
For each Individual Quiche:
*Using the Rim of a Glass, cut Puff Pastry and place in bottom
*Add 1 Tbsp. Ricotta Cheese
*Sprinkle 1/4 Cup Chopped Ham
*Sprinkle Mozzarella Cheese
*Add Approx. 1/2 Cup Egg Mixture

Repeat for Each Quiche
*Bake at 350 Degrees for 30 Minutes
*Remove From Tin & Serve with Fresh Cantaoupe for a Refreshing Breakfast

Thursday, June 3, 2010
What to do with Leftover Ham?

Does anyone else take pictures of their mother's ham? No? Just me? OK then.
Well, it was delicious. I believe she basted it in brown sugar, brown mustard, orange juice and seasonings. But mom, if you are reading, correct me if I am wrong.
My mother gave me a mountain of sliced ham to bring home. Now, comes the question, "What can I do with the leftover ham?" I will decide tomorrow. Stay tuned.
Tuesday, June 1, 2010
The Best Damn TIRAMISU Ever

Memorial Day weekend should be a relaxing time to spend with friends and family, a time to unabashedly stand by the barbecue with two beers in one hand, a glass of red wine in another and a hot dog dangling from one's mouth, a time where sunburns and babies run amok and the scent of toasted fireworks fill the air. Memorial Day weekend is relaxing, of course unless you offer to bring tiramisu to a friend's barbecue party. I'm not saying I did not enjoy making the dessert, I am simply saying that running around to store after store to purchase the ingredients was a huge pain in my ass.
I had to visit ACME for the ladyfingers, cocoa, instant espresso powder (which was oddly placed in the "ethnic" aisle rather than the coffee aisle), eggs and heavy whipping cream. Then I had to visit two liquor stores for the coffee liquor and the dry marsala. But where can I find marscapone cheese? Thankfully, Mancuso's on Passyunk Avenue answered their phone at 7:00 as they were closing and told me to rush over there before the Flyers game started. As I illegally parked outside, I had someone run in to purchase the Marscapone cheese and the necessary homemade lemon water ice loaded with bits of fresh lemons (not a necessity to the dessert, but oh so good).
My list is finally complete. Now, to the kitchen!!
Here's a list to bring with you to the Grocery store(s):
Dry & Baking Goods:
6 tablespoons instant espresso powder
1/2 cup plus 3 Tbsp. Granulated Sugar
Unsweetened Cocoa Powder for Dusting
40 Ladyfingers
1 Tsp. vanilla Extract
Dairy:
1 cup Heavy Whipping Cream
1 Pound Marscapone Cheese
5 Egg Yolks
Liquor:
1/3 cup Dry Marsala Wine
8 Tbsp. Coffee Liquor
Other:
1/8 Cup Orange Juice
4 cups boiling hot water
Directions:
Over a pan of boiling hot water, beat 5 egg yolks, Marsala, and 1/2 cup sugar in a saucepan for 7 minutes or until pale yellow in color and remove from heat.**
**This is called zobaglione, which by itself tastes great when served alongside fresh fruit and a dollop of whipped cream.
Add vanilla extract to tub of mascarpone cheese and stir until combined.
Add mascarpone mixture to pan of zobaglione and stir until combined.
In a separate pan, whip heavy whipping cream until stiff peaks form, which is approximately 5 minutes.
Fold whipped cream into mascarpone mixture.
In a separate pot, boil 4 cups of water over high heat. When water comes to a boil, remove from heat and add espresso powder, 4 tbsp sugar, orange juice and coffee liquor and stir until sugar and espresso powder have dissolved. Let cool.
Set aside a 13x9x2 baking pan
Dip each ladyfinger into espresso mixture for 6 seconds.
**While soaking each ladyfinger, hold a firm grip on the ladyfinger, so to tell when the the cookie starts to loosen up from being soaked. Once the pressure gives way, remove it from mixture and immediately set it into the pan. This procedure causes the cake to become very moist and irresistible, not crunchy and heavy.
Fill the bottom of the pan with the ladyfingers using approximately 20 for each layer
Spread ½ of the mascarpone mixture over the ladyfinger mixture.
Add a second layer of dipped ladyfingers over the mascarpone mixture and end with a second layer of mascarpone mixture.
Liberally coat the top with cocoa powder using a sifter
Cover with foil or plastic wrap in refrigerator overnight
Before serving, add a second coating of cocoa powder to the top of the dessert and create designs in the powder if you like using a fork.
Friday, May 21, 2010
What would you like to see in a Food Blog?
I have been asking around Twitter. I have been asking my friends. I have even asked my mother.
Everyone, what would you like to see in a Food Blog?
Recipes- of course. Tips and Tricks- Why Not. Amazing Photography of Food- I'm working on it OK so get off my back! But what else people?
I have received a good amount of ideas but I want to hear from YOU so just leave a COMMENT and let me know what your favorite food blog has that this blog doesn't (that's to say that this food blog isn't your favorite).
Thanks everyone and I look forward to this upcoming conversation.
Monday, May 17, 2010
Late Recipes
Sorry everyone, I have been slow on posting recipes. Not to say that I haaven't been cooking. I have been cooking, I just haven't posted recipes.
I will post my Frugal Fare Friday recipe here later today. A bit late, yes- but better late than never.
I will post my Frugal Fare Friday recipe here later today. A bit late, yes- but better late than never.
Friday, May 7, 2010
Locatelli Cheese Crisps- Foodgitive's Frugal Friday Fare
 (Yeah, I definately used my hand towel as a background for this pic alongside a bottle of red wine in hopes to create an authentic Italian feel.)
I have an affinity for cheese. Aged, smoked, nacho, cottage, creamed, sliced, diced, minced- you name it, I have a close, bonded attraction to it.
Locatelli Romano Cheese is hard and dense, bearing a pale yellow color and a black paper rind. Tradtionally, Locatelli cheese is served over pasta. But can one create a snack on locatelli cheese alone?
This recipe is simple to replicate, impossible to resist and easy on your wallet. You can purchase an entire pound of Locatelli cheese and keep it in your fridge for what seems an eternity, or until you are finished with the block. I store my block of Locatelli cheese in wax paper, which is wrapped in paper towels and stored in a paper bag.
 (Check out my mound of cheese)
Since I purchased the cheese a vey long time ago, I am unable to give you an exact cost to make these little fritters, but I will take a stab at the cost and say these cheese crisps are $0.35 for approximately 30 crisps.
Locatelli Cheese Crisps
What You'll Need:
*1 cup grated Locatelli Cheese
*Freshly cracked grains of paradise or black pepper
*Old Bay Seasoning
*Wax Paper
Directions:
*Heat oven to 400 degrees
*Place a piece of wax paper on a baking sheet
*Separate cheese into bowls (1/2 cup in each)
*Add approx. 1 tsp. grains of paradise or black pepper into each bowl and mix together
*To make Old Bay Cheese Crisps: Add approx. 1 tsp. old bay seasoning into one of the bowls and mix together
*Scoop a heaping teaspoon of mixture onto wax paper, pressing down lightly to form a thin circle (making sure it is not too thin)
*Cook for exactly 3 minutes and remove from oven
*Wait 10 minutes to cool and scrape off with a spatula

These little guys taste great inside a burger, alongside a salad, topped with your favorite salsa and will even taste great when paired with your favorite ice cream-- Trust me- Delicious!
Wednesday, May 5, 2010
Grilled Cheese Crouton Caprese Salad with Pesto Vinaigrette

Have you ever wondered what makes a grilled cheese sandwich so delicious? Could it be the rich buttery taste of the bread? Maybe the creaminess of the melted mozzarella cheese? Or, could it be the crispy texture of the formation of the bread into toast? Maybe even add a splash of color and a bolt of bold flavor with a creamy pesto spread. Let's just say it is all of the above.
Now, pair that delicious grilled cheese sandwich with a pesto vinaigrette, cherry tomatoes and transform the sandwich into croutons. You now have a different spin on an Italian Caprese salad, which is traditionally compiled of fresh mozzarella, tomatoes and fresh basil. Check, Check and.... Check.
Grilled Cheese Caprese Salad with Pesto Vinaigrette
What You'll Need:
4 slices Wheat Bread or Spelt Bread
Butter for pan
Pesto Sauce
1 tsp Red Wine Vinegar
Grape Tomatoes
6 slices Mozzarella Cheese
Salt & Pepper
Directions:
Place 1 tsp. butter in hot pan and swirl around to melt
In the meantime, spread pesto on 2 slices of bread
Place 3 slices of mozzarella cheese on 1 slice of bread and place other slice of bread (pesto side down) on mozzarella
Place on pan and press down with spatula, cooking for a few minutes on each side, making sure not to burn.
Make 1 more sandwich
In the meantime, cut in half a few handfuls of grape tomatoes and toss in bowl
Mix together 1 tbsp pesto with 1 tbsp red wine vinegar and whisk together with fork and add to bowl
Cut up sandwiches into small, bite size pieces and add to bowl
Add a pinch of salt and some freshly ground black pepper
Combine ingredients and serve
Friday, April 30, 2010
Foodgitive's Frugal Friday Fare:
Fresh Ahi Tuna Salad w/ Smoked Paprika, Grapes, Fresh Roasted Beets, Walnuts, Apples & Greek Yogurt

Cost per serving: $2.52- Yeah, I know, but hear me out:
The decision to make a fresh tuna salad was an easy one. I had a coupon for Greek yogurt and was wondering what to do with it. There are so many ideas that popped into mind where Greek yogurt can be used. You can substitute Greek yogurt for sour cream in your quesadillas and stroganoff, swap it with your morning yogurt and granola, use it as a coating to seal in the moisture of chicken when baking, or use it as a substitute for mayonnaise.
I have not always been a Greek yogurt connoisseur, however. For all of my childhood and most of my twenties, I have always used mayonnaise with my tuna. Once, I used relish and hated it and then decided on salsa and hated that even more. So, I felt as if I was “stuck” with mayonnaise, feeling as if there was nothing else in the world that could make it taste better. Then, thanks to a coupon I printed online from Whole Foods, I discovered Greek yogurt. Forget about mayo, I have found my new love.
A can of tuna is $0.79, I know. But does this packed-in-water, processed, not-at-all-fresh, blah-tasting can of tuna have apples, grapes, beets, paprika listed as some of its ingredients? I think not. So, you might be sitting there thinking that $2.52 per serving for a tuna salad is hardly saving you anything, you are wrong my friend. Here's why:
1.It is less expensive than going out for lunch- So you are saving money
2.It is yummy- so you are saving your tummy from a horrible meal
3.It is fresh- so you are again, saving your health because you are not eating pre-packaged, processed canned goods
This delicious tuna salad can be served between two pieces of spelt toast, on a bed of spinach, or simply by itself. That's for you to decide. My preference: the spelt toast. Spelt bread has such a better taste and texture than wheat or white bread and is easier to digest, and tastes great with this tuna salad.
What You'll Need:
2 Ahi Tuna Steaks- Approx. 6-8 oz. each
1 ½ Lemons (1 lemon sliced and juice of ½ lemon)
1 cup Greek Yogurt
½ cup Crushed walnut pieces (roughly chopped)
3 Fresh Roasted Beets (Recipe Below)
1 Granny Smith Apple
25 Grapes
Olive oil for drizzling
Salt
Pepper
½ tbsp. Smoked paprika (seems like too much but you'll love this bold flavor)
Roasted Beets
Directions:
*Set oven to 400 degrees
*Cut leaves and stems off of beets, leaving approx, two inched left at ends

*Scrub beets with running water, getting in between stem remnants to remove excess dirt
*Pat dry
*Place each beet on a large square of tin foil and wrap around to seal all sides

*Place in oven and cook for 50 minutes
*Once finished cooking, remove from oven, open tin foil seal to let steam out and cool to touch
*Once cool, peel off skin with a knife and cut off ends of beets
*Cut into thin strips
Fresh Paprika Tuna Salad with Grapes, Beets, Walnuts, Apples & Greek Yogurt
Directions:
Drizzle a small amount of olive oil
*Season both sides of tuna with salt and pepper
*Place on Tin Foil with three slices of lemon on each piece of fish

*Fold over sides to create small packets
*Place on baking sheet in oven (already cooking beets at 400 degrees) for 13 minutes
*Remove from oven, open packets, remove from baking sheet and let cool for 10 minutes
*While fish is cooking, prepare other ingredients:
*Peel skin from apple and cut into thin strips and toss into large bowl or container
*Roughly chop walnut pieces and toss into bowl
*Cut grapes in half lengthwise and toss into bowl

*Mix together Greek yogurt, paprika, and salt and pepper to taste and toss into bowl
*Add juice of ½ lemon to bowl
*Flake apart fish with fork and add to bowl
*Add beets
*Mix together ingredients
*Add salt and pepper to taste
*Serve
Subscribe to:
Posts (Atom)